Before you open Lovable, Bolt, or Cursor, write a one-page plan with five things: the user and problem in two sentences, the one assumption the MVP must test, a must-have feature list with an explicit "not in version one" list, your stack constraints, and acceptance criteria for the first three features. Those tools are fast at building from instructions. A plan makes sure the instructions describe the product you want, and it stays useful if you switch tools later.
Below is a practical pre-build checklist, with notes on how to hand the plan to each type of tool.
Why planning first saves you credits and rework
Lovable, Bolt.new, and Replit are app builders that generate a working application from a description. Cursor, Claude Code, and similar tools are coding assistants that work inside a codebase. Both groups are good at execution, and both meter usage in some form, through credits, tokens, or requests. Lovable's own documentation explains that you need credits to send messages (Lovable docs).
That's why unclear instructions are expensive. Every vague prompt produces something, and correcting it costs another prompt. The pattern founders describe is familiar: the first version appears quickly, then each fix breaks something else, and the credits go into going in circles.
Planning won't remove iteration. It makes each iteration aimed at a known target. For the full budget picture, see how much it costs to build an MVP with AI.
The pre-build checklist
Work through these in order. The whole thing fits on one page and takes an evening, not a week.
1. User and problem, in two sentences
Write who the user is and what problem they have, specifically enough that you could find ten of them. "Parents in Gothenburg who plan the weekly shop on Sunday and overpay because comparing stores takes too long" works. "People who want to save money" doesn't.
2. The one assumption your MVP tests
Finish this sentence: "This idea fails if..." Your MVP exists to test that. For a grocery price comparison app: "families won't come back weekly because the prices aren't accurate enough to trust."
3. Must-haves and an explicit cut list
List the features without which the core value fails. Then write the features you are deliberately not building yet, each with a one-line reason. App builders will happily add anything you mention, so leaving a feature out of the prompt isn't enough. Say it's out.
4. Stack constraints
Even if you never write code, decide these:
- Budget: what you can spend on hosting and services each month
- Scale: expected users in the first year
- Team: who will maintain this after launch (you, a freelancer, an agency)
- Compliance: GDPR if you have EU users with accounts, or stricter rules if you handle health or payment data
- Ownership: do you need to export the code and run it elsewhere later?
- Users see a list of stores with name and location
- Users can select several stores at once
- The selection is remembered next time
- There are select-all and clear options
- The comparison only shows selected stores
- Start with a short project prompt built from items 1, 3, 4 and 7: the user, the must-haves, the explicit exclusions, and the data.
- Build one feature per prompt after that, pasting its acceptance criteria.
- After each feature, test it against the criteria before asking for the next.
- Connect GitHub or export the code early if your tool supports it, so you're not locked into one place.
- Put the plan in the repository: a short rules file (Cursor rules, CLAUDE.md, Copilot instructions, Kiro steering, or AGENTS.md) for stack and conventions, plus a docs folder for the brief, scope, and decisions.
- Give each task its own session with its acceptance criteria.
- Keep changes on branches and review before merging.
- You can't say what the MVP is testing.
- Each new prompt changes something you thought was settled.
- The app has features nobody asked for.
- You don't know where your data comes from.
- You can't explain the stack choice to a developer.
- Lovable documentation: Plans and credits
- Cursor documentation: Rules
- Claude Code documentation: CLAUDE.md
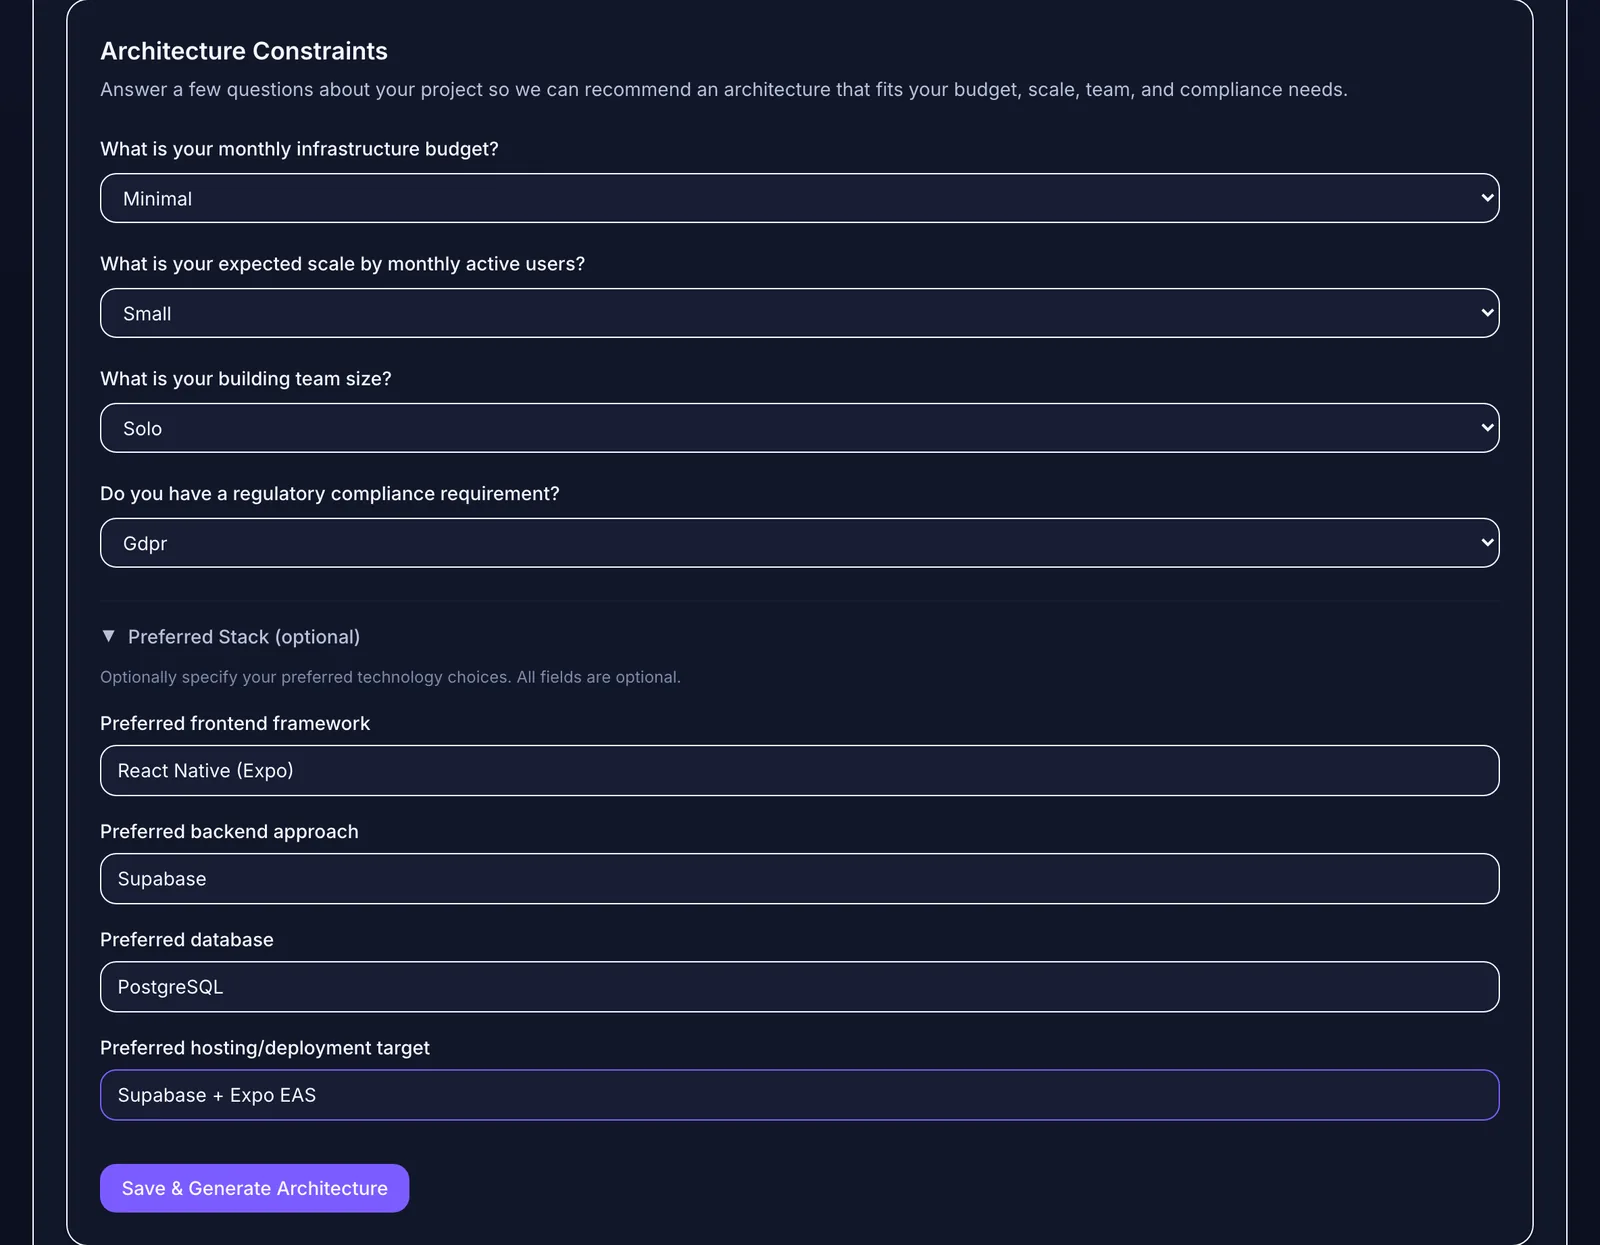 Four constraints (budget, scale, team size, compliance) plus an optional preferred stack.
These constraints affect which tool fits. If you need a mobile app in the app stores, a web-first builder may not be the right start. If a developer will maintain the code later, choose a mainstream stack they know and check that your tool lets you export or sync the code to GitHub.
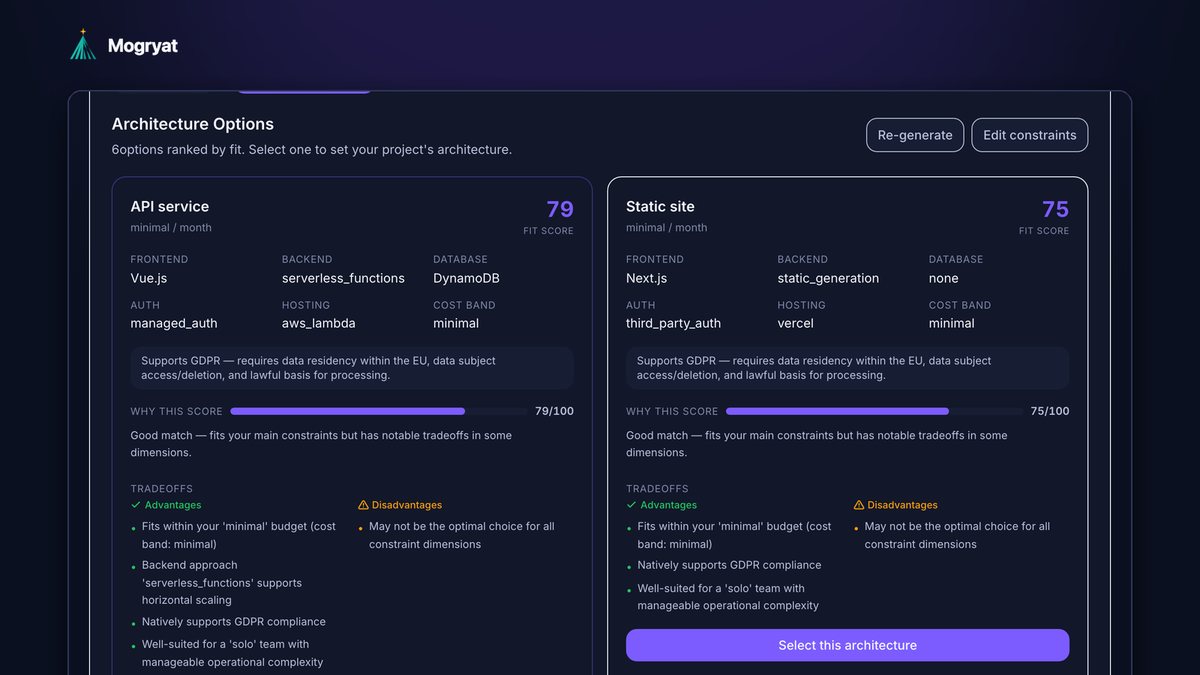
5. Compare two or three options, then decide
Don't accept the first stack a tool picks by default. Compare a couple of options against your constraints and write down why you chose one. You'll want that reasoning the first time something about the stack becomes painful.
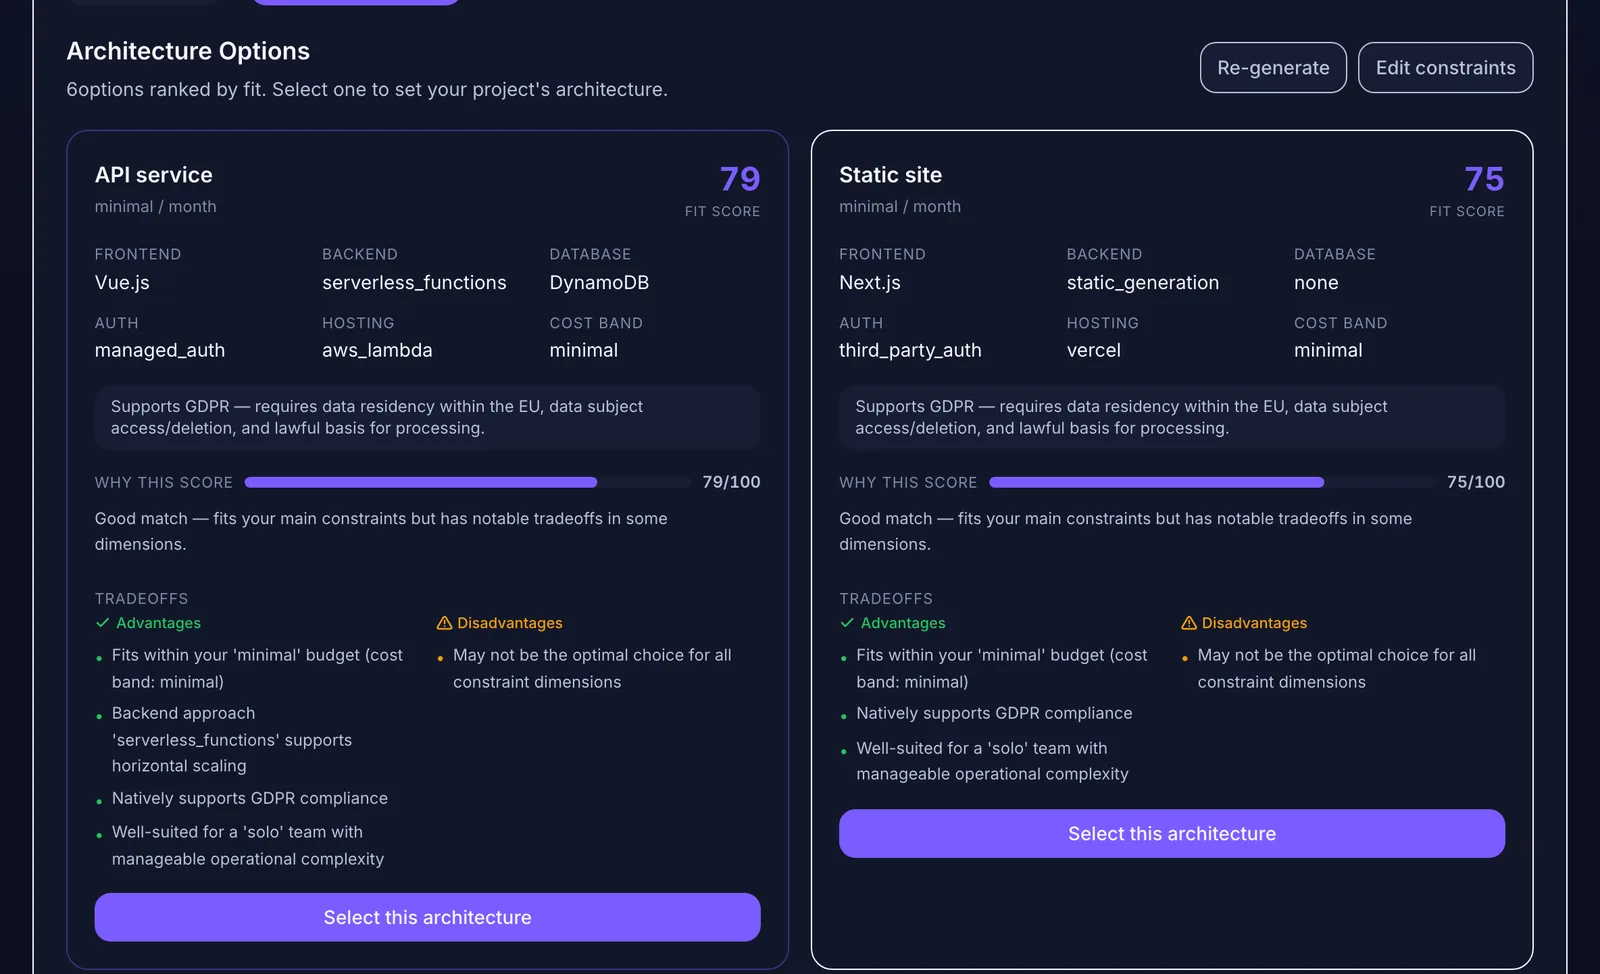 Options are scored against your constraints, with the tradeoffs written out instead of hidden.
6. Acceptance criteria for the first three features
For each of your first three features, write three to six statements that must be true for it to count as done. Example for "store selection":
This is the most valuable part of the plan. It tells the tool exactly what to build, and it tells you exactly what to check.
7. A first data list
You don't need a database diagram. List the things your app stores: users, stores, products, prices, shopping lists. Note where each comes from (users, manual entry, an external source). Data source questions such as "where do prices come from?" often turn out to be the hardest part of the product, and it's better to discover that now.
How to hand the plan to each type of tool
If you haven't chosen a route yet, the guide to building an app with AI without coding compares app builders, coding agents, and freelancers.
App builders (Lovable, Bolt.new, Replit)
Coding assistants in an editor (Cursor, Claude Code, Copilot, Kiro)
The guide to keeping AI coding agents from losing project context covers the rules files for each tool. If you're still choosing an editor, see Cursor vs Claude Code vs Kiro.
Signs you started building too early
If two or more apply, pause the build and spend an evening on the checklist. It's usually cheaper than another week of prompts.
Limitations of planning first
Planning can be overdone. If you're exploring a visual idea or testing whether a concept "feels" right, a quick throwaway prototype in an app builder can teach you more than a document. The point isn't to plan everything. It's to plan the parts that are expensive to change later: scope, data, stack, and what "done" means.
Where Mogryat fits
Mogryat produces this checklist's outputs as a guided flow: a founder interview, a product brief, an MVP scope with must-have and not-in-v0.1 lists, architecture options scored against your budget, scale, team, and compliance answers, a technical plan, and a task board with acceptance criteria and copy-ready prompts for each task.
It's tool-agnostic. The project overview tells you to copy each AI prompt into Cursor, Claude Code, or whatever coding agent you prefer, and the same scope and criteria work as prompts for Lovable, Bolt, or Replit.
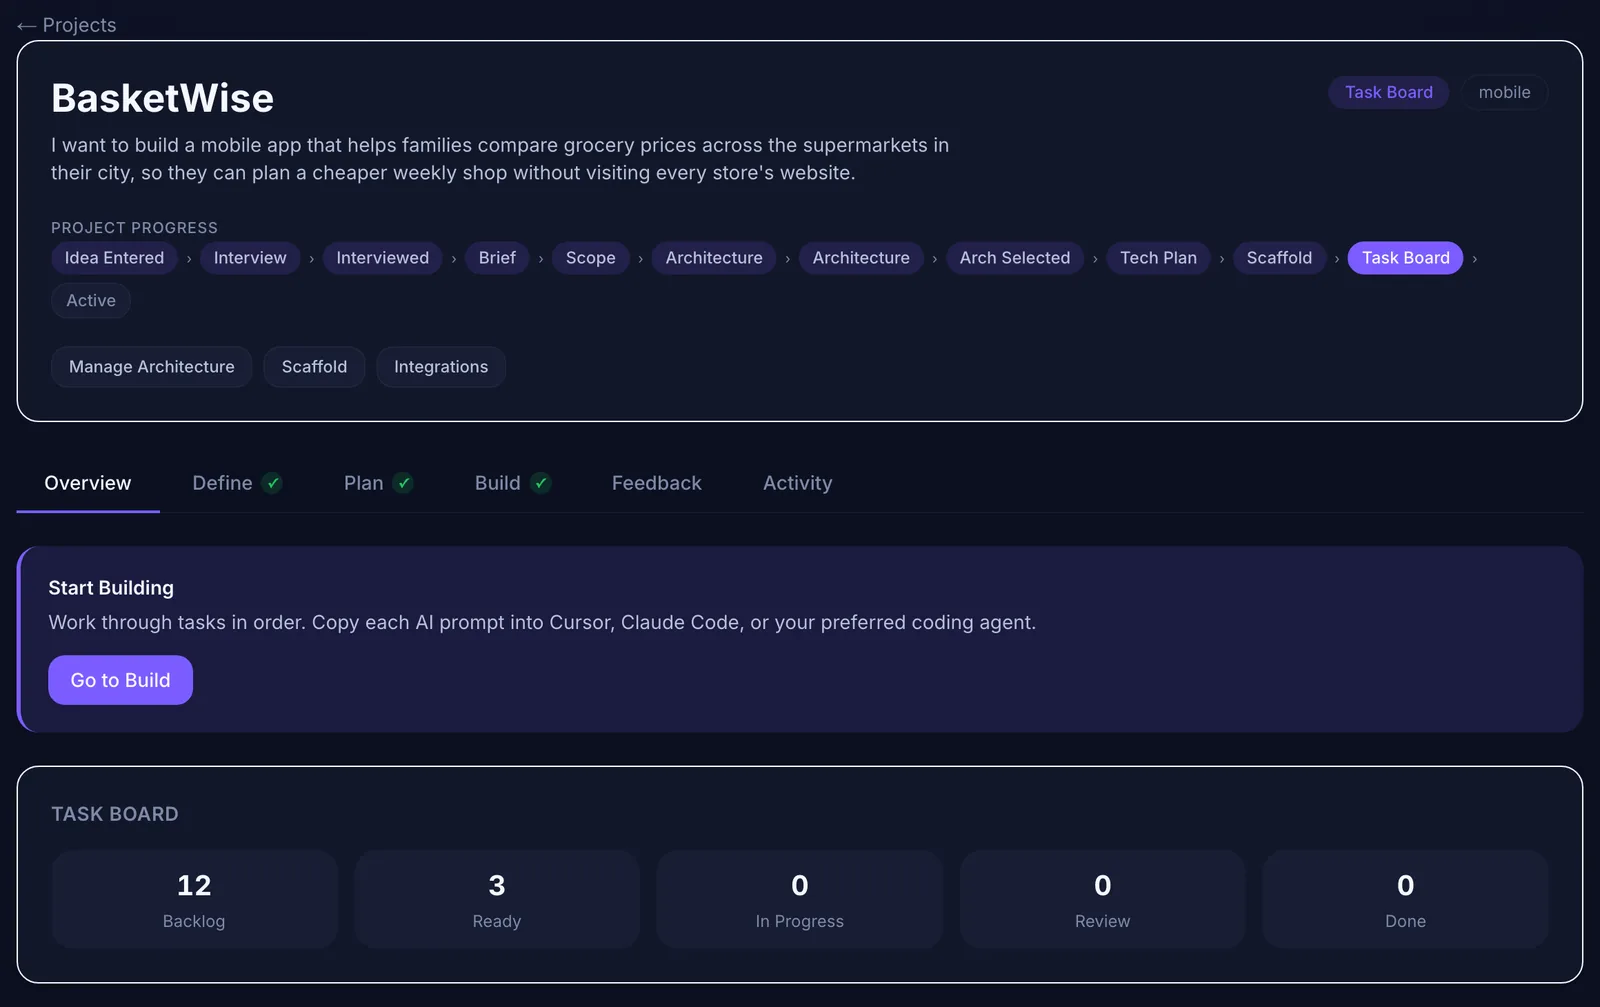 Once the plan is done, the build can happen in whichever tool you prefer.
For the full sequence after planning, see from app idea to launch, and for the scoping step in more depth, how to turn a business idea into an MVP using AI.
Plan your MVP before you spend your first credit →