An AI-assisted development workflow that gets an app from idea to launch has six stages: clarify the idea, write a short product brief, cut the scope to a real MVP, choose the architecture, break the work into small tasks with acceptance criteria, and then build, review, and ship those tasks one at a time before feeding user feedback back into the plan. AI can help at every stage. What it cannot do is decide for you what the product is, which is why the planning stages come first.
This guide walks through each stage with a worked example, shows what "done" looks like at every step, and explains where the process usually breaks down. New to building with AI? Start with how to build an app with AI without knowing how to code.
Why AI-built apps stall halfway
AI coding tools are very good at turning a clear instruction into working code. Most stalled projects don't fail there. They fail because the instructions were never clear, and nobody noticed until the code existed.
Three patterns show up again and again:
- The prompt is the plan. The founder types "build me a grocery price comparison app" and gets something impressive in an afternoon. Then every new request reshapes the app, because there was never a written definition of what version one includes.
- Context lives in chat history. Decisions made in Tuesday's session are gone on Thursday. The AI suggests a different database, renames things, or rebuilds a screen that already worked. Here's how to stop AI coding agents from losing project context.
- Nobody checks the output against anything. Without acceptance criteria, "it looks fine" becomes the test. Bugs, security gaps, and missing edge cases pile up quietly.
- Stage 1, Clarify: who the user is, what problem they have, what they do today. Output: interview answers.
- Stage 2, Brief: a one-page product brief. Output: problem, users, value proposition, MVP objective, risks, success criteria.
- Stage 3, Scope: what ships first and what waits. Output: must-have, should-have, could-have, and not-in-v1 lists.
- Stage 4, Architecture and plan: stack choice and a technical plan. Output: a recorded decision with tradeoffs, plus a data model.
- Stage 5, Tasks and build: small tasks with acceptance criteria, built one at a time with an AI coding tool and reviewed before merging.
- Stage 6, Launch and learn: release to a small group, collect feedback, turn it into new tasks.
- Who is the main user? Age, habits, and what triggers the need.
- What problem do they have, and what happens today when it goes unsolved?
- How do they cope now? Another app, a spreadsheet, or nothing?
- What would make them switch?
- Which platform will they reach for: phone, laptop, or both?
- What data does the product need, and where does it come from?
- Do users need accounts in the first version? Payments?
- What is the biggest risk: technical, data, or market?
- What would success look like after the first release?
- Problem statement
- Target users
- Proposed solution, in one paragraph
- Core value proposition, in one sentence
- MVP objective, written as a measurable outcome
- Key assumptions and risks
- Success criteria
- Must have: without it, the core value proposition doesn't work.
- Should have: improves the experience but the test still works without it.
- Could have: nice ideas for later.
- Not in version one: explicitly out, with the reason written down.
- Budget: how much can you spend on hosting each month?
- Scale: how many active users do you expect in the first year?
- Team: just you, or a small team?
- Compliance: GDPR, HIPAA, PCI DSS, or none?
- A short title and a two-sentence description
- A type (frontend, backend, data, testing) and a priority
- Acceptance criteria: three to six checkable statements that define "done"
- Implementation notes: constraints the code must respect
- The project context the AI needs: stack, conventions, and what already exists
- Give the AI the task, its acceptance criteria, and the project context, not just a one-line request.
- Have the change made on a separate branch, with a pull request you can look at.
- Check the result against the acceptance criteria. If you can't read code, check the behavior: run the app and walk through each criterion. There's more on reviewing AI work without reading code.
- Let automated checks (tests, linting, a build) run before anything is merged.
- Merge only when every criterion passes.
- Users can sign up, log in, and reset a password.
- Personal data is protected, and you have a privacy policy if you collect any.
- Errors are logged somewhere you will see them.
- The database is backed up.
- You know which single number tells you whether the MVP worked (BasketWise: families using the app three weeks in a row).
- Planning documents are only as good as your answers. AI can structure your thinking, not replace market knowledge. Talk to potential users before stage 2.
- Reviewing without reading code has limits. Behavior checks catch functional problems. They don't catch every security issue or bad structural decision. For anything that handles payments, health data, or sensitive personal data, pay for an expert review before launch.
- Small tasks need discipline. It is tempting to batch three tasks into one prompt. That's usually when quality drops.
- Tools change quickly. Pick tools that keep your plan and code portable, so switching an AI coding tool doesn't mean starting over.
The workflow below fixes each of these by producing a small written artifact at every stage. Each artifact becomes input for the next stage, and for the AI tools you use along the way.
The six stages at a glance
The rest of this article follows one fictional example project through all six: BasketWise, a mobile app that helps families in one city compare grocery prices across supermarkets.
Stage 1: Clarify the idea before anything is generated
Start with the questions a good product manager would ask. You don't need a template, but you do need specific answers to these:
For BasketWise, vague answers ("people who want to save money") would produce a vague product. Specific answers ("parents in Gothenburg who do one big weekly shop and plan meals on Sunday evening") give every later stage something concrete to work with.
AI is useful here as an interviewer. Ask it to question you rather than to write the app. A prompt like "Ask me ten questions a product manager would need answered before scoping an MVP for this idea, one at a time" works in any chat assistant.
Stage 2: Turn the answers into a one-page brief
The product brief is a short document that states what you are building and why. It should fit on one page and cover:
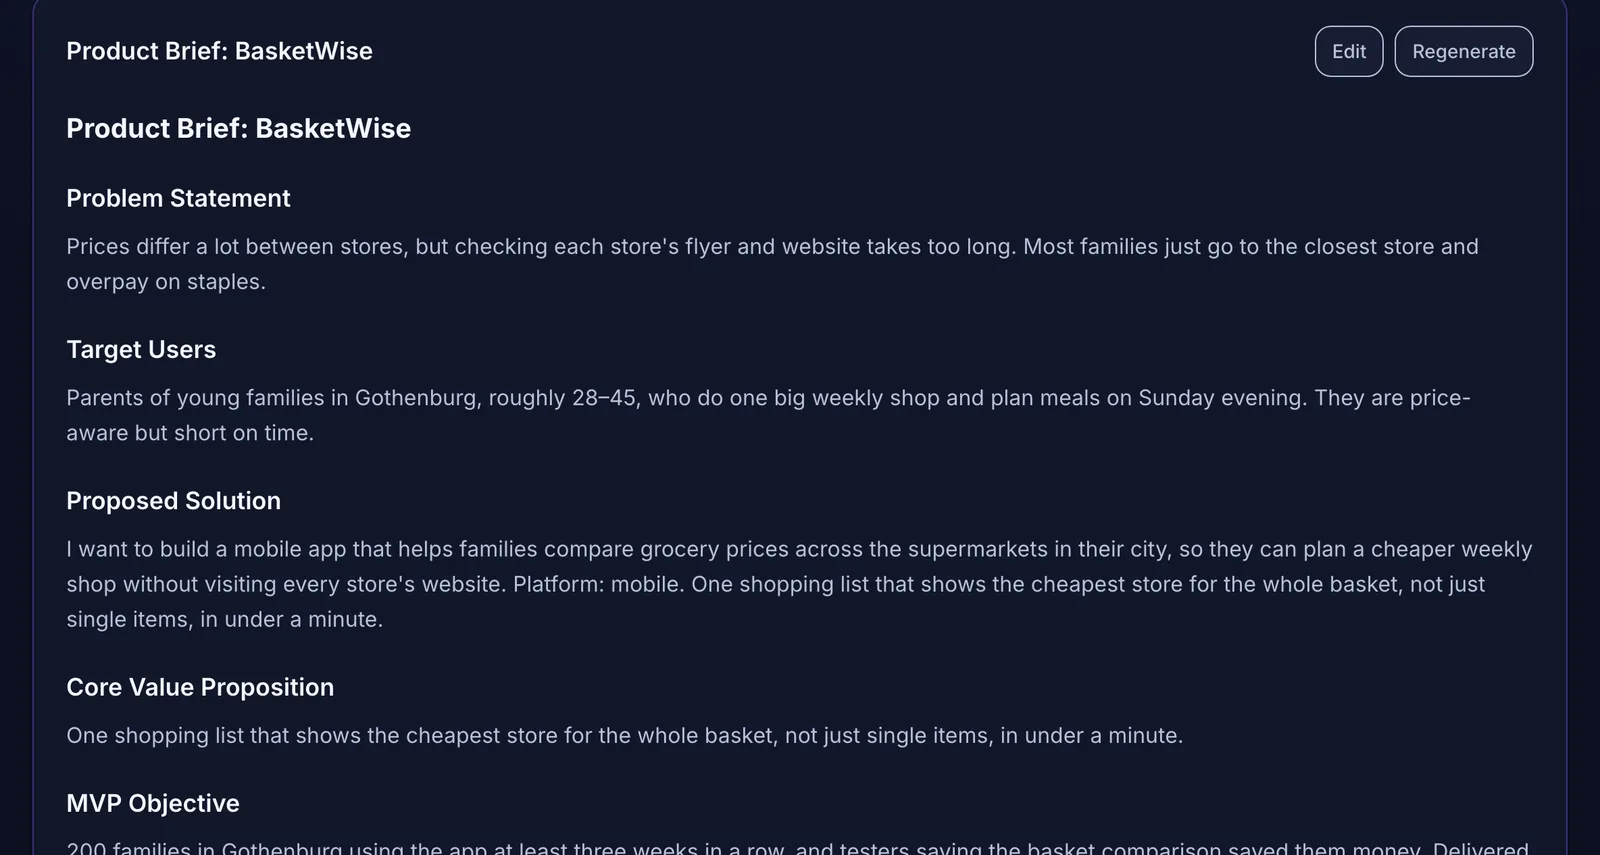 Stage 2 output: a product brief built from the interview answers.
The brief is where you catch fuzzy thinking. If you can't write the value proposition in one sentence, the app will try to do too many things. For BasketWise it became: one shopping list that shows the cheapest store for the whole basket, not just single items, in under a minute. If you need a fuller document, here's how to write a PRD with AI.
Stage 3: Cut the scope until it hurts a little
An MVP is the smallest product that can test your riskiest assumption with real users. Scope is where most founders over-build, because AI makes every extra feature feel cheap. It isn't: every feature adds screens to test, data to maintain, and context for the AI to keep straight.
Sort every feature into four buckets:
The last bucket matters most. BasketWise deferred automated price scraping (legal and technical risk), multi-city support (validate one city first), and payments (prove repeat weekly use before charging). Writing the reason next to each cut stops the same debate from restarting every week. For a full scoping walkthrough, see how to turn a business idea into an MVP using AI.
Stage 4: Choose the architecture on purpose
Non-technical founders often let the first AI tool they try pick the stack. That's a decision with long-term consequences for cost, hiring, and how easily other tools and developers can work on the code.
Make the decision from four constraints:
Then compare two or three options against those constraints, and write down why you picked one. A technical plan follows from the choice: frontend, backend, database, authentication, a first data model, and the first development steps.
If you have a preference (for example, a stack a developer friend already knows), state it. A familiar stack that someone can help you maintain usually beats a theoretically better one nobody around you knows.
Stage 5: Build in small tasks, and review every one
This is where AI coding tools come in: Cursor, Claude Code, GitHub Copilot, Kiro, Lovable, Bolt, Replit, or an autonomous agent. The tool matters less than the size and clarity of what you hand it. Before you open one, read how to plan an MVP before using Lovable, Bolt, or Cursor.
Break the technical plan into tasks that each do one thing. A good task has:
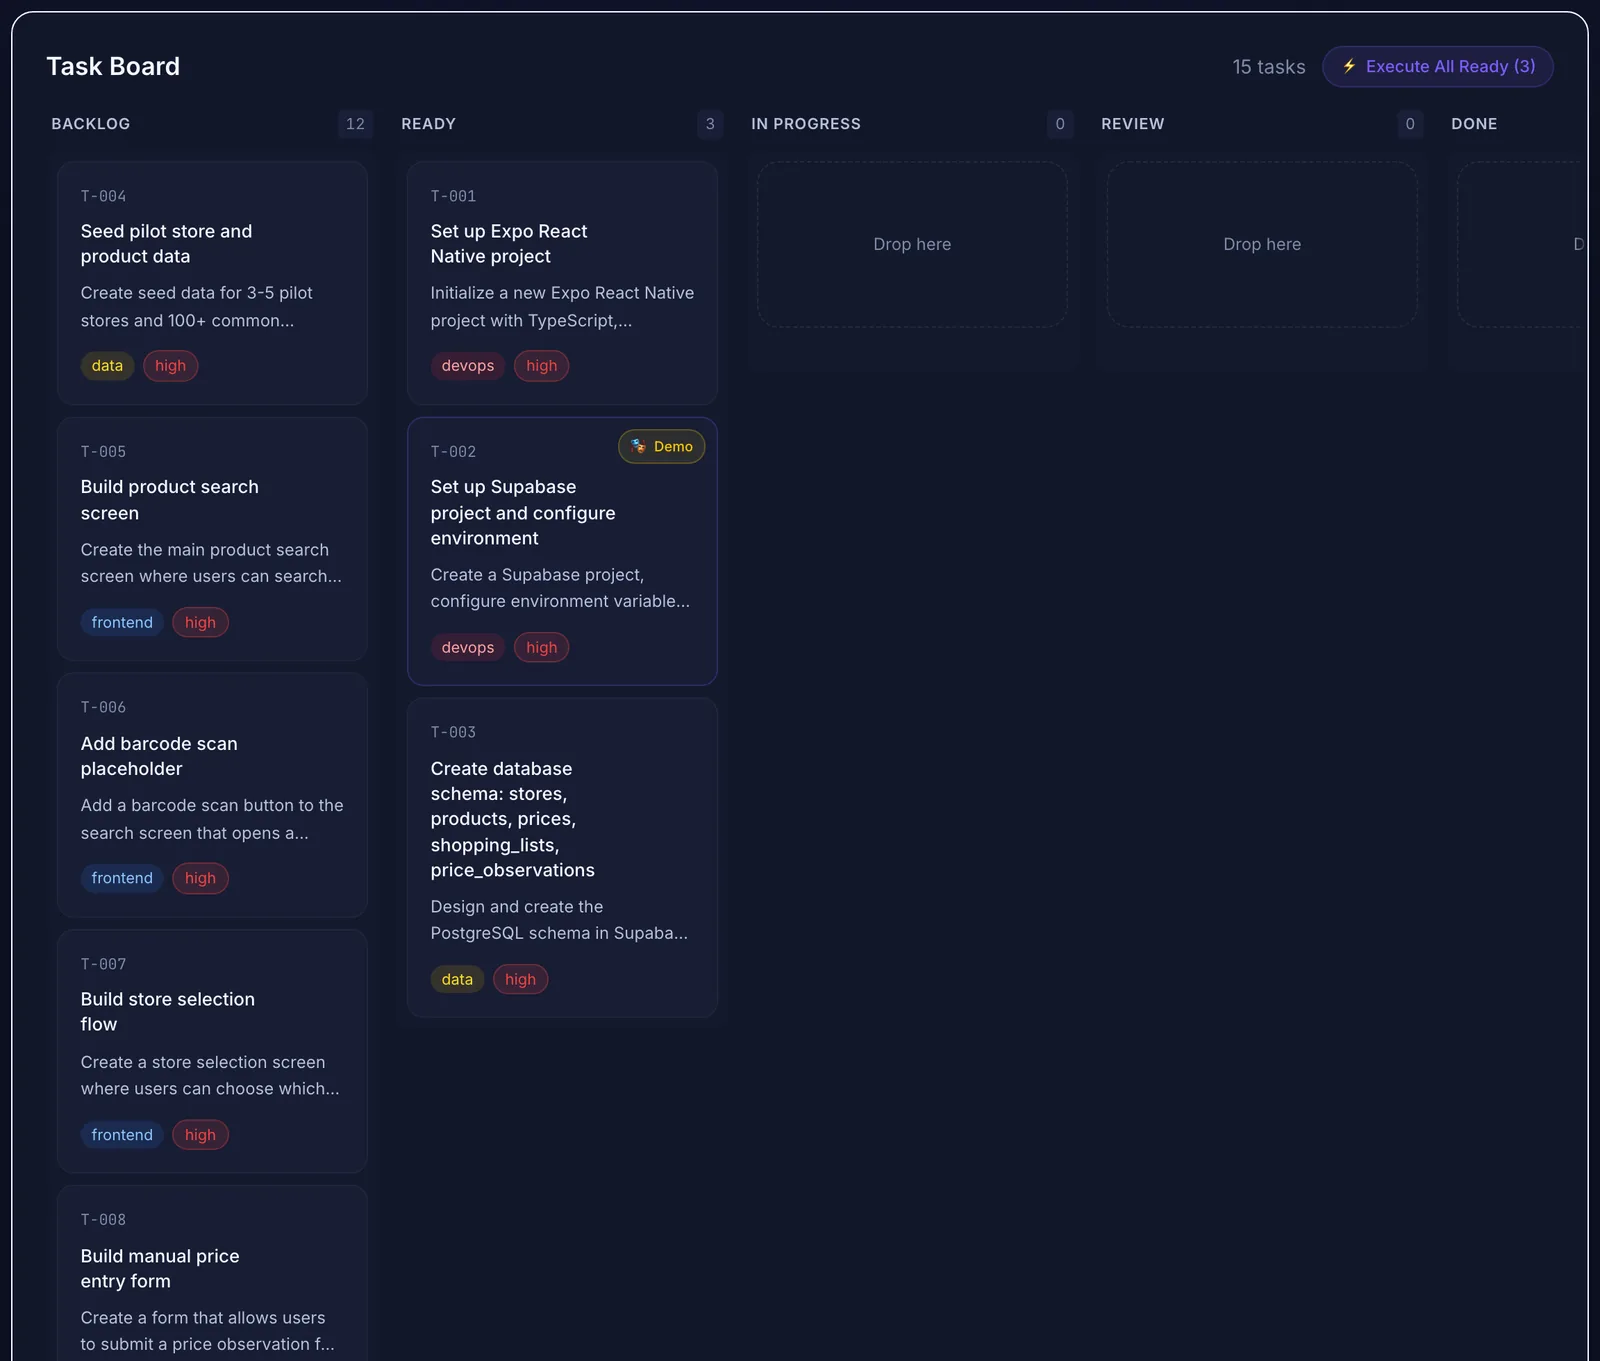 Tasks generated from the technical plan, each numbered with a type and priority. The first three start as Ready.
Work through tasks in order, starting with project setup, the database schema, and seed data. For each task:
This feels slower than one big prompt. In practice it is faster, because you find problems while they are small and the AI has a clear target each time.
Stage 6: Launch small, then let feedback drive the plan
"Launch" for an MVP means putting it in front of a small group of real users, not a big public release. Before you invite anyone, check the basics:
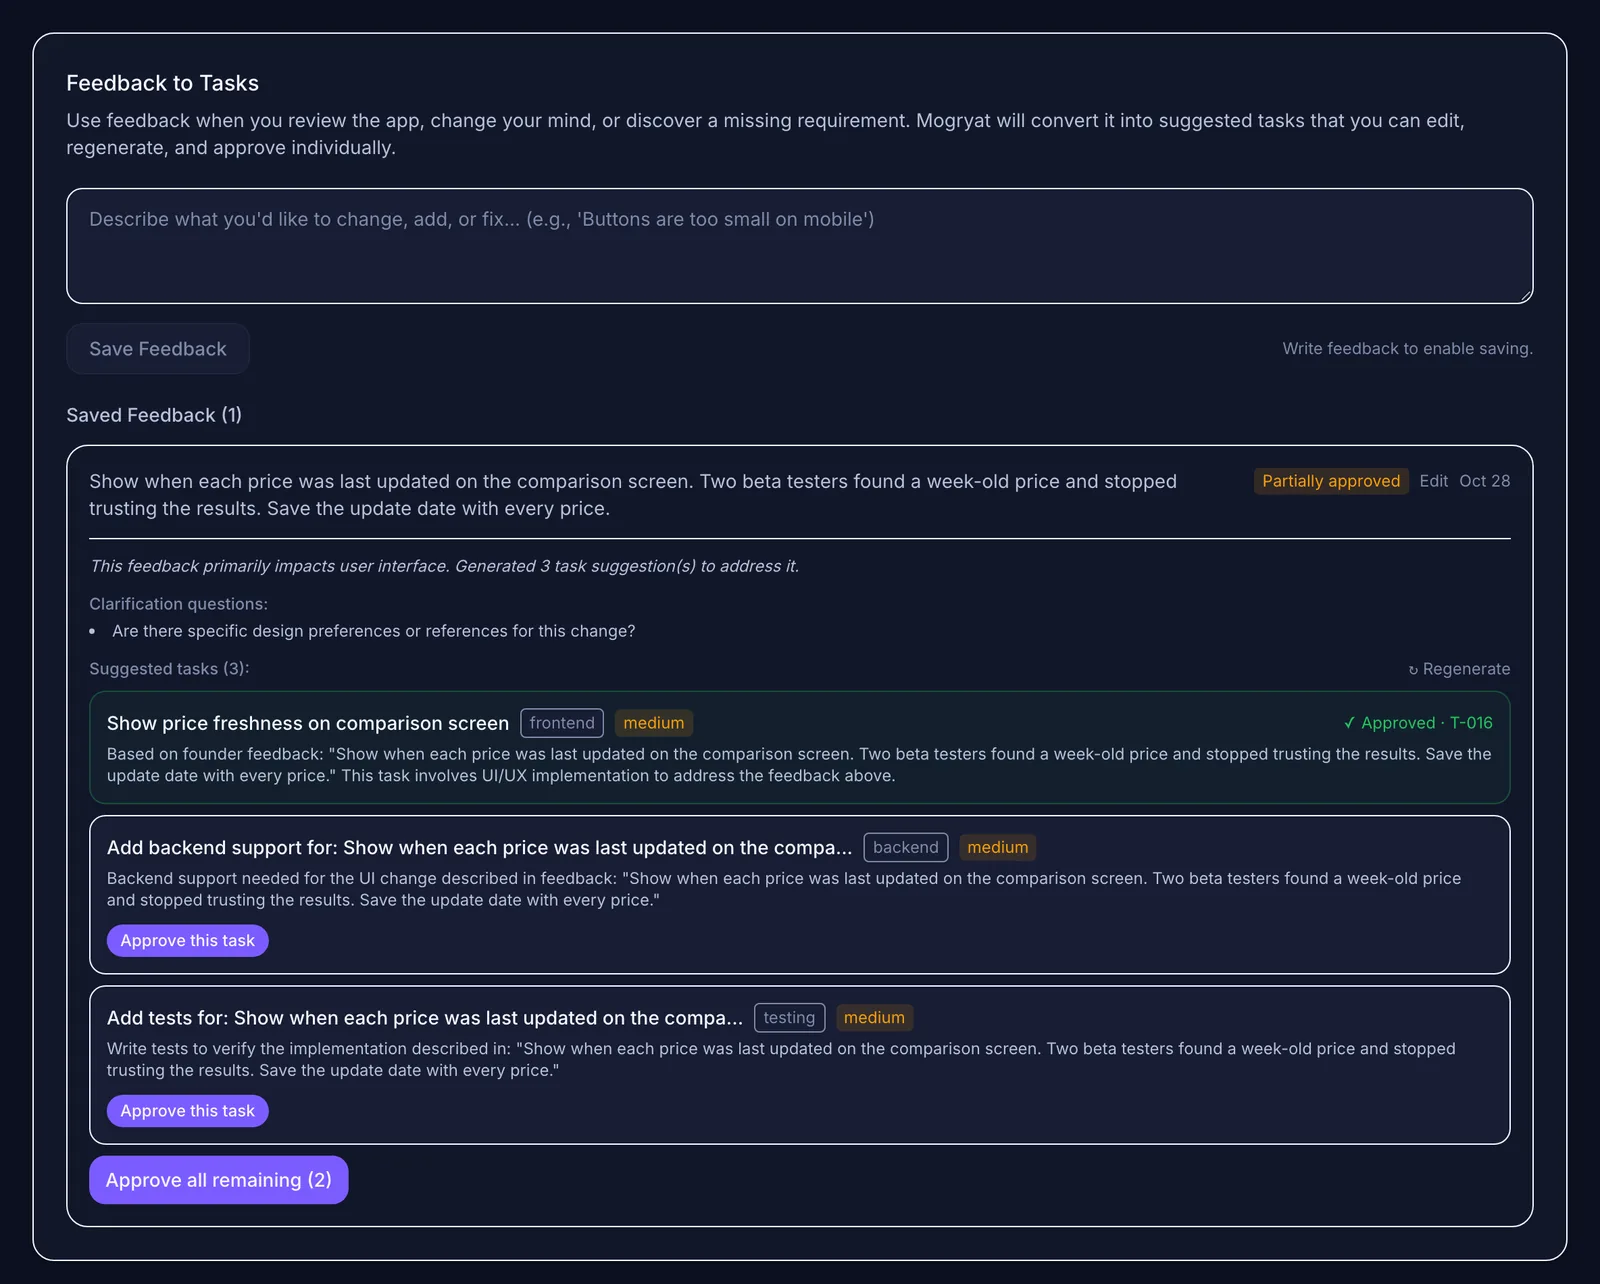
Then collect feedback and turn it into work. The mistake here is pasting every comment into an AI chat and asking it to "fix it." Instead, log each piece of feedback, decide whether it matters for the MVP objective, and convert the important ones into new tasks with their own acceptance criteria.
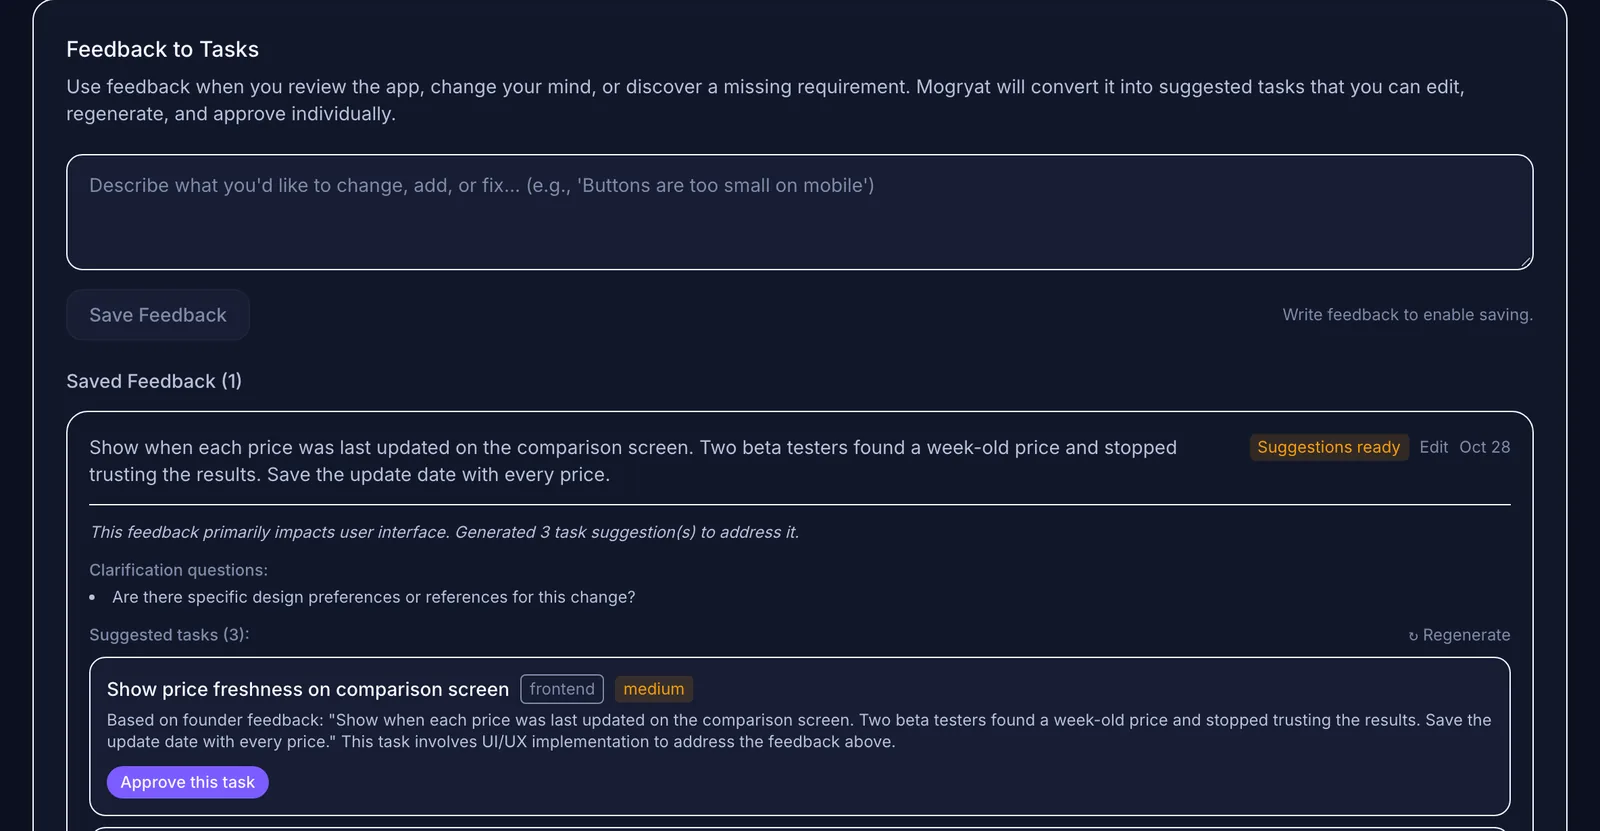 Stage 6: tester feedback becomes suggested tasks you approve one by one.
Suppose two BasketWise testers stop trusting the app after seeing a week-old price. That becomes a specific task: show when each price was last updated on the comparison screen. It goes onto the same board as everything else.
 Approved suggestions land on the same board, so the plan and the work stay in one place.
Where this workflow is harder than it looks
Being honest about the limits will save you time:
For the most common traps, see 10 mistakes non-technical founders make when building with AI.
Where Mogryat fits
Mogryat is built around this workflow. You describe the idea in plain language, answer a founder interview, and Mogryat generates the product brief, MVP scope, architecture options scored against your constraints, a technical plan, and a task board. Every task carries acceptance criteria and a ready-to-paste AI execution prompt that includes the project context.
From there you can copy prompts into the coding tool you already use, or connect your own API key for OpenHands, Claude, or GPT-4o and run tasks from the board. When a GitHub repository is linked, runs happen on their own branch with a pull request and CI status. An evidence-based check marks each acceptance criterion as verified or not (no AI self-assessment), and nothing counts as done until you approve it. Feedback turns into suggested tasks you approve individually.
It doesn't replace user research, and it doesn't make security review optional. It keeps the plan, the context, and the work in one place, so each AI session starts from what you already decided.
If you want to see the workflow before signing up, the two-minute demo walkthrough shows how to explore sample projects without an account, and why Mogryat isn't another code generator explains the thinking behind it.
Start with stage 1 today
You can run stage 1 in the next half hour with nothing but a notebook: answer the nine questions above as specifically as you can. If you'd like the rest of the stages structured for you, Mogryat turns those answers into a brief, scope, and task board you can build from.
Turn your app idea into a structured MVP plan →
Prefer to look around first? Open the demo project, no signup needed.